Friday, April 22, 2011

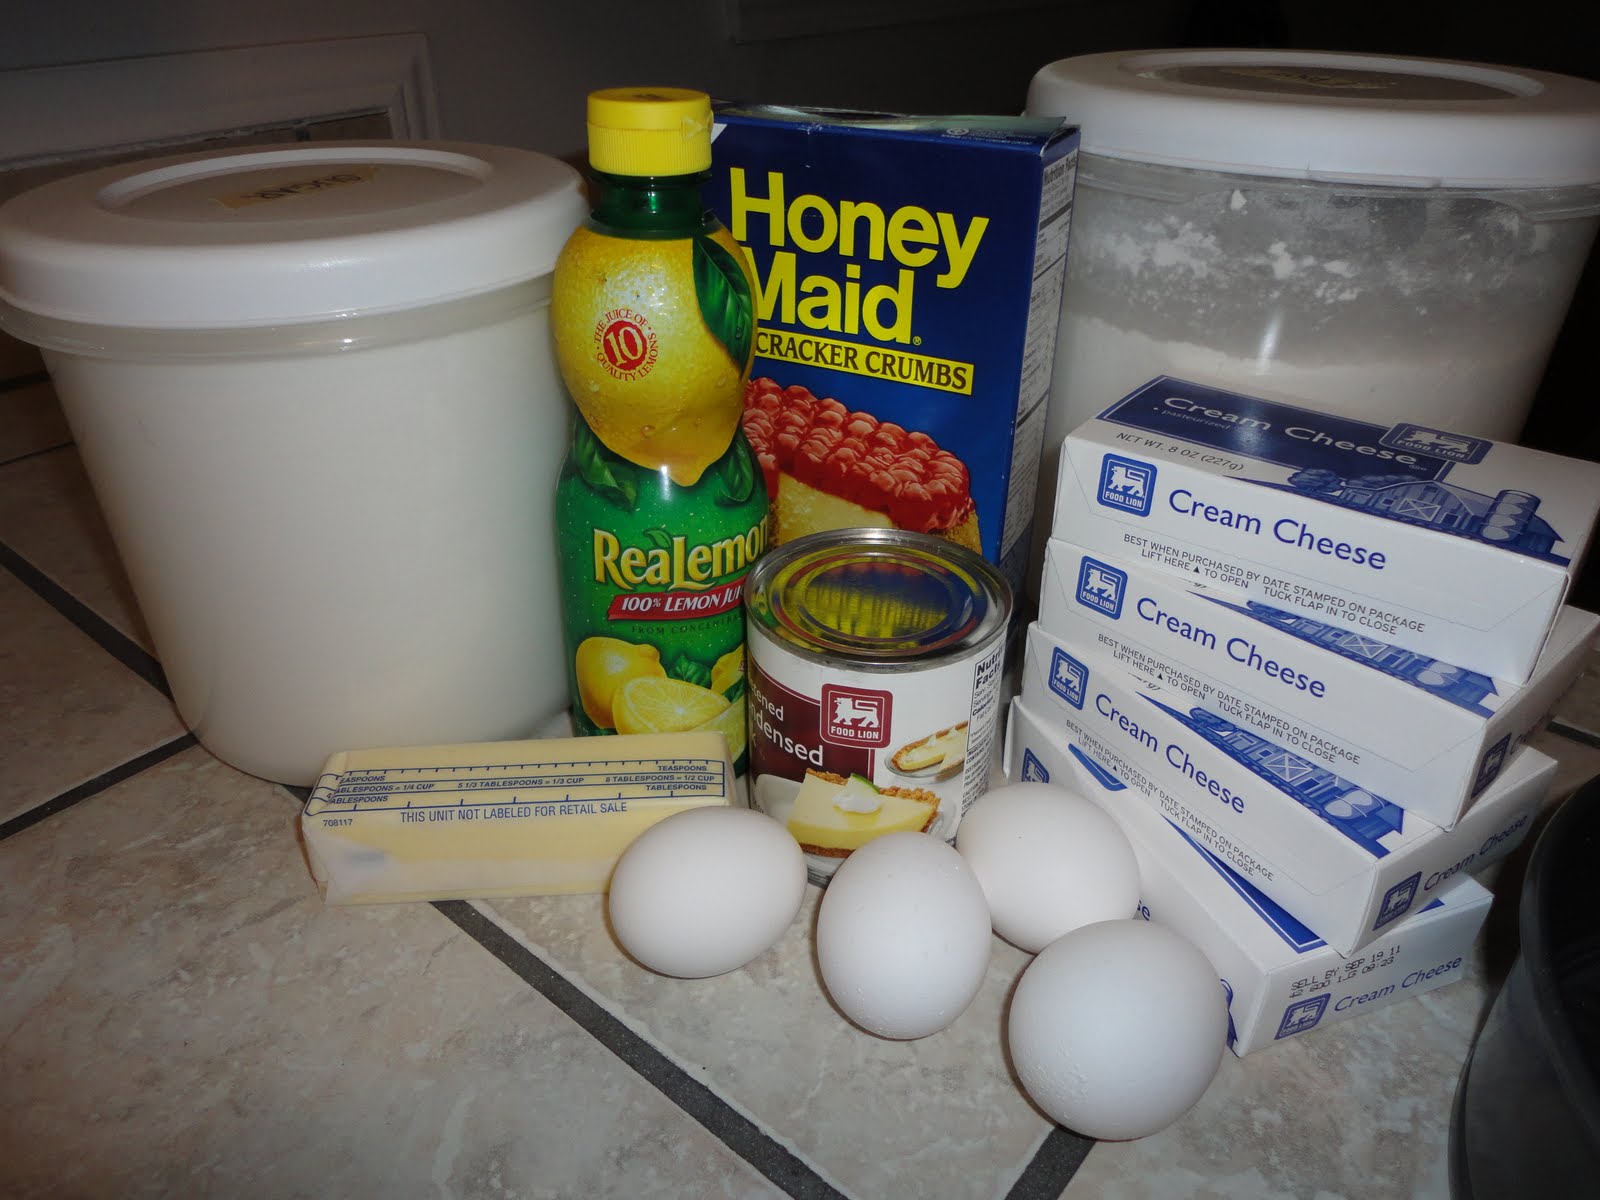
New York Cheesecake

The Mission:
To make a cheesecake for my husband for his birthday.  Even though his birthday was two weeks ago, I figured he'd still like one!  I've only made one cheesecake in the past, but since he's not a fan of raspberry, I decided to go with a tried and true New York style using a recipe that I stole from my sister.  Since I had the day off and my husband had to work, I planned to have this delicious dessert prepared for him when he got home as the grand finale to a yummy meal of corned beef with cabbage and potatoes.
  
The Ingredients:
  • 1 1/4 cups graham cracker crumbs 
  • 1/4 cup granulated sugar 
  • 1/3 cup butter, melted 
  • 4 (8 oz. each) blocks of cream cheese, softened 
  • 1 (14 oz.) can sweetened condensed milk 
  • 4 eggs
  • 2 Tbsp flour
  • 1/4 cup lemon juice 
The Instructions:
  1. In a medium sized mixing bowl combine the graham cracker crumbs and the sugar.  Pour in the melted butter and stir with a fork until crumbs are evenly moistened.  
  2. Press the mixture firmly and evenly onto the bottom of a 9" spring form pan.  
  3. In a large mixing bowl, beat the cream cheese until fluffy.  Gradually beat in the sweetened condensed milk until mixture is smooth. 
  4. Add in the eggs, flour, and lemon juice, mixing well.  Pour cheese mixture into the pan.  
  5. Bake in a preheated 300*F oven for 1 hour and check - the edges should be solid and the center of the cake should be jiggly (like pudding) - it will set as it cools.  If cake is too jiggly or liquidy, bake longer, checking every 5 minutes or so.   
  6. Cool cake on the counter for an hour and then transfer to the fridge to chill for at least 4 hours.  Serve with whatever topping you'd prefer (raspberry sauce, cherry pie filling, etc.) or enjoy plain.   
The Results & Reviews:
YUM!  It turned out fantastic.  My husband was very, very happy with his birthday cake - he's very reluctant to share, so I'm not sure I'll get any other reviews..... though I'm pretty proud of myself that it turned out so well on the first try.  I used a dark non-stick spring form pan, which made my cake bake a little quicker than usual, so I adjusted this recipe to bake for 1 hour instead of the extra ten minutes my sister's recipe had listed.  The flavor, density, and creaminess of this cheesecake are an excellently rich combination.  I'd recommend not taking too big a piece, since a little goes a long way with this delicious dessert.

Sunday, January 30, 2011

Weekly Menu: January 30th - Feb 5th

Sunday:  Hot dogs with meaty chili and potato chips - our favorite brand was on sale this week!  I love stocking up on a good sale.

Monday:  Roasted Pork Loin with cheesy mashed potatoes (out of a bag) and green beans - pork loin was also on sale.  It was a good week at the grocery store.

Tuesday:  Grilled chicken breast (not sure what I'll marinate them in quite yet.....) with mac'n'cheese and peas

Wednesday:  Fried Pork Chops with pinto beans (yuck) and broccoli (yum)

Thursday:  London Broil with baked potatoes and California blend veggies

Friday:  Chicken Pot Pie

Saturday:  ???????

Saturday, January 22, 2011

Weekly Menu: January 23rd - 28th

Sunday: Grilled chicken, side salad, and rice.

Monday:  Lasagna

Tuesday:  Soup and Sandwiches

Wednesday: Beef Stir-fry

Thursday:  Hot dogs with chili, raw veggies on the side

Friday:  Roasted beef with sauteed mushrooms.  Baked potato for my husband and a side of zucchini for me.

Saturday:  Take out - probably Pizza - and hanging out at a friend's house.

Saturday, January 15, 2011

Pecan Pie

The Mission: 
To use some of the pecans that husband's friend gave us after Christmas.  I'd heard that The Pioneer Woman makes a fabulous pecan pie, so I went to her website and decided to use this recipe.  I was pretty pleased to see that I had all of the ingredients on hand.... though I chickened out and used a store bought refrigerated pie crust instead of making my own.  (Though I do  plan on trying my hand at pie crust some other time..... eventually..... when I find my courage the time.)

The Ingredients:
  • pie crust - unbaked 
  • 1 cup sugar
  • 3 Tbsp brown sugar 
  • 1/2 tsp salt 
  • 1 cup corn syrup (I used light) 
  • 3/4 tsp vanilla extract 
  • 1/3 cup melted butter (salted) 
  • 3 eggs 
  • 1 heaping cup of broken pecans   
The Instructions:
  1. Prepare the pie crust in a 9" pie plate.  
  2. Pour the pecans into the unbaked crust.  
  3. Mix the remaining ingredients in a medium mixing bowl and pour mixture over the pecans.  
  4. Cover the top and crust of pie gently with aluminum foil.  
  5. Bake in a 350*F oven for 30 minutes.  
  6. Remove foil and bake an additional 20 minutes.  
  7. If the pie is too jiggly, re-cover with foil and bake until set.  (My pie took an extra 15 minutes in the oven until I felt it was solid enough.)   
The Results & Reviews: 
 Okay.  Let's start off with things that were good... 
1 - For the most part it tasted fine.... well at least the filling did.  The crust edges were a bit too done for my taste.
2 - It was easy enough to make, though apparently I'm missing something since it wasn't perfect (or even close to perfect).

Now let's talk about what is not so good.
1 - Even though I recovered with aluminum foil in order to bake the jiggly pie an extra 15 minutes, the crust came out too done and the top tasted a tad burnt.  (and the filling somehow managed to stick to the foil and peeled off - you can see in the pictures.)
2 - it was UGLY.  Really ugly.  Again - see pictures.
3 - The crust cracked during baking and syrupy filling got underneath and stuck everywhere.  Not quite sure how that happened.
4 - As the husband pointed out, the gel part of the filling wasn't smooth but instead had turned lumpy and weird.

Overall score:  No one else ate or saw the pie except for the two of us, so I don't have many reviews to go by.  If I do make pecan pie again - which I will soon - I will try a different recipe.  Obviously I missed some key step in this one in order to have it turn out lovely and rave-worthy.  But since we ate it and didn't throw it out, I guess it wasn't all that bad.  I'm just glad I didn't attempt this for company!

Tuesday, January 11, 2011

Asian Chicken with Broccoli

The Mission:
Make something a little different using the chicken that I thawed.  We haven't had any Chinese in a while, so I figured that a chicken/broccoli stir-fry would be tasty and easy enough to make.  So I added broccoli to the grocery list and hit up Food.com for a simple recipe.  Hopefully I have sesame oil.... I can't remember if I ran out or am almost out.  Oh well.  I added in some cornstarch to thicken the sauce a bit as well. 


The Ingedients: 
  • 4 cups cubed chicken 
  • 1 bag ( 16 oz) frozen broccoli florets 
  • 4 cloved minced garlic 
  • 5 Tbsp brown sugar
  • 1/3 cup sesame oil - I was out so used peanut oil
  • 1/2 cup soy sauce
  • 1 1/2 tsp grated ginger root 
  • 2 tsp cornstarch
  • 2 Tbsp oil (I used peanut oil)
  • rice to serve with 
The Instructions: 
  1. Heat 2 Tbsp oil in a large skillet. 
  2. Add the chicken and the garlic and stir-fry until chicken is no longer pink. 
  3. In a small bowl or measuring cup, combine the sauce ingredients (brown sugar, sesame oil, soy sauce, ginger, and cornstarch) until smooth. 
  4. Pour over chicken and stir. 
  5. Add broccoli and stir-fry until broccoli is tender (but not mushy) 
  6. Serve over hot rice. 
The Results & Reviews:  
This recipe is a definite keeper.  Not only was it super easy to make, my husband just raved about it.  I'm glad I decided to make extra.  As mentioned above I was out of sesame oil, so I just used peanut oil.  Though the sesame oil would've given it a slight bitterness to offset the sweetness of the brown sugar, I think the full third cup would add too much bitter, so when I make it again I will start with adding just a tablespoon of the sesame oil to see how it turns out.   Adding the cornstarch to the thicken the sauce gave it a great texture - so that was a definite plus.  I have a feeling that my husband is going to be requesting this meal often.  Actually - he thinks the sauce would be good with beef, so I'm sure I'll be blogging about that in the next few weeks!

Sunday, January 9, 2011

Weekly Menu: Jan 9th - 15th

Sunday: I'll making a new recipe! Asian Chicken w/ Broccoli to serve over white rice.

Monday: Roasted Pork Loin with mac'n'cheese and mixed veggies.

Tuesday: London Broil with baked potatoes and green beans.

Wednesday: Sandwiches and possibly soup.

Thursday: Venison Steaks - sides to be determined

Friday: Fried Pork Chops with pinto beans (yuck) and some veggie.

Saturday:  Up in the air!

Saturday, January 1, 2011

"Food Orgy Finale 2010!!!"

This is what my bestest friend in the whole wide world dubbed our New Year's Eve Celebration.  He picked me up early on the 31st to hit the store after we got our menu together.  Our spread was to include:

Cheese Sticks & Marinara Sauce
Honey BBQ Chicken Bites
Sliced Sausage with Cheese and Crackers
White Trash Puff Balls
Cocktail Weenies in BBQ sauce
Sausage Balls
Tiny Piggies in Blankies (made with some of the cocktail weenies)
Lemon Meringue Pie

Basically we ate our way into the new year.... which was tasty and fantastic!  When the ball dropped at midnight we attempted to wake up my husband so we could toast the new year.  Unfortunately it was a futile attempt, so instead we went out side with our glasses to see if we could spy any fireworks that the neighbors were setting off. 

Ironically enough we both resolved to lose more weight in 2011.  So our days of gorging ourselves on fantastically delicious and horribly unhealthy food will be limited.  Oh well - we did decide that we can splurge every now and then and are looking forward to making some wonderfully tasty dishes in the near future.

Monday, December 27, 2010

Weekly Menu: December 26 - 31st

The week following Christmas is always a little crazy, but I'm hoping I can manage to get things together to have an easy time figuring out what to do for dinner!

Sunday: Frozen Pizza - lame, I know

Monday: Dinner at my parents house to finish off Christmas leftovers

Tuesday: Venison BBQ (or as my brother-in-law calls it: Bambi-que)

Wednesday: To be determined - suggestions welcome!

Thursday: Possibly hamburgers - I need to make up my mind!

Friday: New Years Eve!!! We will be heading to a friend's house for pickups. Due to popular demand, I'll be bringing Crack Dip for sharing - and most likely some Christmas cookies.

Sunday, December 26, 2010

Southern Style Grits


The Mission:

I was given this bag of Charleston Favorites Yellow Grits as a gift from my third cousin and his wife. They were visiting over the Thanksgiving holiday after recently moving back to the Charleston area. I've only had instant grits before and never cared for them, so I figured I'd wait and make these for someone who really enjoys grits.

My husband's dad came to visit us for Christmas, and I know he likes yummy grits, so I made these for breakfast the day after Christmas. I was pretty excited to have someone really look forward to this treat! He said that yellow grits were one of his favorite things to eat growing up. Serving them with bacon and scrambled eggs seemed to go over quite well.


The Ingredients:

  • 1 and 1/3 cup Charleston Favorite Grits

  • 4 cups water

  • 1 and 1/4 tsp. salt

The Instructions:

  1. Put the measured amount of grits into a heavy saucepan. Cover them with water to help bran rise to the top. Drain as much of the bran and water off as possible.
  2. Pour the 4 cups of measured water over the rinsed grits and stir in the salt.
  3. Bring to a boil and reduce to simmer for 28 minutes - stirring occasionally.
  4. Serve hot with butter, salt, and pepper

The Results & Reviews:

I was a bit worried about how they would turn out since I've never made them before, but I was assured that they tasted wonderful. Rinsing the bran part off seemed to go alright, though I was sure I'd screw that up. At first I didn't realize that grits are more of a side dish and not the main event like oatmeal or cream of wheat. Thankfully I had some bacon in the fridge and plenty of eggs so I could whip up a proper breakfast.

Now for those of you who know me know that I'm not a Southern girl. You also know that I hate, hate, hate bacon. So obviously I skipped the meat part.... but maybe you'd be surprised to know that I didn't only try the grits, I actually liked the grits! I added some butter, salt, and pepper to my portion and they tasted pretty good. I'm beginning to wonder if it's just the instant stuff that tastes icky, or if the Charleston Favorites brand is just spectacular. Either way everyone loved breakfast and I felt pretty good about it!

Sunday, December 19, 2010

Scotcheroos

The Mission:

Make Gramma's Scotcheroo recipe for Christmas time. It's been many years since I've made these or even eaten one. In my family it's quite a big hit. Gramma's been making them for many years and passed on her recipe to me. They're easy enough to make and everyone seems to love them.

The Ingredients:

  • 1 cup sugar
  • 1 cup light Karo syrup
  • 1 cup creamy peanut butter
  • 6 cups Rice Crispy cereal
  • 1 cup chocolate chips
  • 1 cup butterscotch chips

The Instructions:

  1. In a 4 quart saucepan cook the sugar and syrup over medium heat stirring frequently until boiling. Remove from heat.
  2. Stir in the peanut butter. Add the Rice Crispies and stir until blended. Lightly press mixture into a greased 9 x 13 inch pan.
  3. Melt the chocolate and butterscotch chips together and stir until blended. Spread evenly over the crispy mixture.
  4. Cool until firm - do not put in the refrigerator - and then cut into bars.
The Results & Reviews:

They turned out absolutely divine! I melted the chips together in the double boiler which makes it very easy to get a nice smooth texture. I also find it easiest to measure out the peanut butter and rice crispies ahead of time so I can stir them immediately into the hot sugar/syrup mixture. Make sure you use a large enough pan to stir in all six cups of rice crispies.

My husband had never had these before and raved about how tasty they were. I have a feeling that he'll be requesting these often in the future. They always disappear quickly off of a cookie tray, but I always make sure to reserve a few for my family who are die hard Scotcheroo lovers.


Saturday, December 18, 2010

Chewy Ginger Cookies

The Mission:
Make yet another kind of cookie for Christmas this year that is tasty and delicious. I selected these chewy ginger cookies that I've made in the past but apparently never blogged about. They come out very soft so if you're looking for crunchy ginger snaps, this is not the recipe for you! But if you enjoy a chewy, spicy treat - then give this recipe a try. (This is a doubled recipe and makes about 8 dozen or so cookies)


The Ingredients:
  • 4 and 1/2 cups flour
  • 4 and 1/2 tsp gruond ginger
  • 2 tsp baking soda
  • 2 tsp ground cinnamon
  • 1 and 1/4 tsp ground cloves
  • 1/4 tsp salt
  • 1 and 1/2 cups shortening
  • 2 cups sugar
  • 2 eggs (not 4 like pictured)
  • 1/2 cup molasses
  • 3/4 cup extra sugar for rolling

The Instructions:

  1. In a large mixing bowl cream the shortening, eggs, 2 cups sugar, and molasses.
  2. Beat in all of the spices and mix well. Gradually add the flour and mix until dough is formed.
  3. If desired, refrigerate dough for an hour or so. Roll dough into 1-inch balls and roll each ball in the extra sugar.
  4. Place sugar coated balls on a non-greased cookie sheet and press down lightly with the bottom of a glass.
  5. Bake for 8 to 10 minutes in a preheated 350*F oven or until cookies are done. Cool on a wire rack and store in an airtight container.

The Results & Reviews:

They turned out really well and I'm glad I learned the trick of pressing them down a bit with a glass before baking. They don't spread very far and I found that if they weren't pressed down, they came out a little humped and underdone in the middles. Now - ginger cookies are not beloved by all people like chocolate chip are, so some people won't care too much for them. I found that it's nothing personal. I happen to love ginger, so of course I like this recipe. Mom would rather have them crunchy and thinner so next year I'm going to make a dozen or so that are pressed much flatter than normal to see how they turn out!

Friday, December 17, 2010

Cookie Baking Day

The Christmas 2010 Cookie List

1. Chocolate Chip
2.
Oatmeal Raisin
3.
Jumbo Raisin
4.
Sugar Cookies
5. Scotcheroos
6.
Chewy Ginger
7.
Snickerdoodles
8.
Peanut Blossoms
9.
Chocolate No-Bake


I love to bake cookies and give them out as gifts. Above is just a fraction of the tins and containers I gave out or used to store the hoard. This years list is a little longer than usual since I had extra time off work. Cookies are so much fun to make, but after spending two days in the kitchen working on them, I was completely exhausted. Maybe next year I'll either get started earlier and freeze the cookies that will hold well, or enlist some help from someone!

Sunday, December 12, 2010

Weekly Menu: Dec 12 - 18th

Sunday: Out to dinner with a friend

Monday: Left over night

Tuesday: Frozen Pizza ;)

Wednesday: Baked Chicken, creamed corn, California blend veggies

Thursday: White Bean Chicken Chili

Friday: London Broil

Saturday: unknown!

Monday, December 6, 2010

Chicken Parmesan

The Mission:

I wanted to try something a little different with my Chicken Parmesan this time around, but I got so busy that I fell back onto my old standard. Oh well - it still tasted really yummy. (And of course I forgot to take any pictures since I was trying to get dinner ready in a hurry!)


The Ingredients:

  • 4 small boneless, skinless chicken breasts - trimmed off fat
  • 1 cup Italian flavored bread crumbs
  • 1/2 cup Parmesan cheese - grated
  • 1/2 cup Mozzarella cheese - shredded
  • 1/2 cup milk
  • 1/2 pound of cooked thin spaghetti or Angel hair pasta
  • 1 jar of your preferred marinara/spaghetti sauce

The Instructions:

  1. Preheat the oven to 350*F
  2. In a shallow bowl, dredge each piece of chicken in the milk, then coat with the bread crumbs.
  3. Place breaded chicken into a shallow baking dish and sprinkle with the Parmesan cheese.
  4. Bake for 30 - 45 minutes or until chicken juices run clear. While waiting for chicken, boil the pasta according to the instructions and warm the sauce until hot.
  5. When chicken is done, top with the shredded mozzarella and return to oven for 5 - 10 minutes or until cheese is melty.
  6. Serve chicken with the pasta and the sauce.

The Results & Reviews:

The chicken turned out just fine, but I served it with a marinara sauce as opposed to my husband's favorite spaghetti sauce (Prego meat flavored) so he didn't think it was as good. Next time I'll make sure to use our normal sauce! But all in all this is an easy recipe to make and it does taste pretty good. In the future I hope to make a really great chicken parmesan that is truly something to brag about.

Sunday, December 5, 2010

Weekly Menu: December 5 - 11th

The weather has finally turned colder so I wanted to make some hearty and warm comfort foods for dinner this week. I've pulled out a lot of my go-to recipes that are easy winter favorites and added a few things that I haven't made in a while. Chicken Parmesan is going to be my blogging concoction for the week - so I'm off to find a great recipe to use!

Sunday: Dinner at a friend's house.

Monday: Improved Chicken Pot Pie

Tuesday: Beef Chili with corn bread

Wednesday: Roasted Pork Loin with Green Bean Casserole

Thursday: Venison Stew and rolls

Friday: Chicken Parmesan with a side salad and garlic bread

Saturday: Throwing a party! Menu TBD.

Sunday, November 28, 2010

Libby's Famous Pumpkin Pie


The Mission:
To make two delicious pumpkin pies to bring for Thanksgiving dinner at my parent's house. And the only way I know how to make delicious pumpkin pies is to use the original Libby's recipe. It's what I've always used and it tastes absolutely wonderful, so I really don't feel the need to try anything else. I am lazy, though, and buy pre-made pie crusts.... perhaps that's cheating but I'm okay with it :)

The Ingredients:
  • 1 can (29 oz.) Libby's 100% pure pumpkin
  • 2 cans (12 oz. each) evaporated milk
  • 1 and 1/2 cups sugar
  • 1 tsp. salt
  • 2 tsp. ground cinnamon
  • 1 tsp. ground ginger
  • 1/2 tsp. ground cloves
  • 5 large eggs
  • 2 unbaked 9 inch pie crusts
The Instructions:
  1. In a large mixing bowl, beat together the canned pumpkin, sugar and all of the spices.
  2. Line 2 9-inch pie plates with the pie crust and press the edges into scallops.
  3. Crack one egg into each pie crust, making sure not to break the yolk. Swirl the pie plates around until the egg white has coated the bottom of the crust. Pour the eggs into the pumpkin mixture and set the pie crusts aside.
  4. Add the remaining eggs to the pumpkin mixture and beat in well. Gradually stir in both cans of evaporated milk.
  5. Divide pumpkin equally between both pie plates making sure you don't over flow the crust. Place strips of aluminum foil over the crusts to prevent burning. (If you have pie shields, use those instead.)
  6. Bake in a preheated 425*F oven for 15 minutes.
  7. Reduce heat to 350*F and bake for 40 - 50 minutes or until knife inserted near center comes out clean.
  8. Cool on wire racks for 2 hours. Serve with cool whip, whipped cream, ice cream, or plain.
The Results & Reviews:
The pies turned out fantastic as I knew they would and everyone gobbled them up. Dinner guests were very complementary, which is always an absolute joy! I'm always sad to see that they're gone since I have an addiction to pumpkin pie and would be happy to eat them all by myself without sharing!
Note: This recipe turns out much, much tastier than Libby's "Easy Pumpkin Pie" with the spices already mixed into the canned pumpkin. I highly recommend using the original and not subsituting "pumpkin pie spice" for all of the individual spices either.

Monday, August 2, 2010

Crumb-Top Choco-Peanut Butter Bars

The Mission:
To find an easy cookie/bar recipe to take to a surprise birthday party. I really wanted to find something that didn't require a trip to the grocery store, either.... so I scoured my little recipe booklets - the ones you can find in the grocery store checkout lane - to find the perfect bar. Success was met when I found this yummy recipe out of a 2005 "Treasury of Holiday Cookies" featuring Jif Peanut Butter.

The Ingredients:
  • 1 cup semisweet chocolate chips
  • 1 cup packed brown sugar
  • 2/3 cup creamy peanut butter
  • 1/2 cup butter (1 stick)
  • 1 egg
  • 1 tsp. vanilla extract
  • 1 1/4 cups flour
  • 1/2 tsp. salt
  • 1/2 tsp baking soda
  • 1 1/2 cups quick oats

The Instructions:
Preheat the oven to 350*F. Grease a 13x9 inch baking pan - I used a non-stick pan so I skipped this step. Melt the cup of chocolate chips - either in a double boiler or the microwave and set aside. In a large mixing bowl cream the butter, brown sugar, and peanut butter until smooth. Add in the egg and vanilla and beat well. Sift in the flour, baking soda, and salt and mix until combined. Stir in the oats. Take 3/4 of the dough and press into the bottom of the baking dish, then spread with the melted chocolate. Dot the chocolate layer with the remaining dough. Bake for 25 minutes and let cool. Cut into bars and serve!

The Results:
I was really making this in a hurry, so I was a bit scared of how they'd end up, but they turned out great. I melted the chocolate in the double boiler, but in retrospect, it probably would've been easier to use the microwave. Even with the melting step, this recipe was easy to put together - using the non-stick pan really helped too, it was a breeze to cut and remove the bars from the pan! They smelled delicious, too :)

The Reviews:
Everyone had great things to say about them, especially my husband. A friend cut them into mini-bars so they were bite sized and easy to handle - they disappeared quite quickly from the serving plate. All in all - they tasted great, were easy to make, and I didn't get any leftovers since my husband took them all! haha. This recipe is definitely a keeper.

Wednesday, July 28, 2010

Improved Chicken Pot Pie

The Mission:
To flavor up the original Chicken Pot Pie recipe so it wasn't so bland. Since it's an easy dish to throw together, I wanted to have another "in a hurry" meal to add to my menu regime, but was disappointed with my first batch. Adding spices and cheese really flavored up the pie and made it into a dish worth making more often.


The Ingredients:
  • 3 chicken breasts - cubed
  • canola or olive oil
  • salt - to taste
  • pepper - to taste
  • paprika - to taste
  • 2 cans cream of chicken soup
  • 1/2 cup (or so) milk
  • 2 (or more) cups frozen mixed veggies
  • 1/2 cup (or so) shredded cheese

For the crust:

  • 2 cups Bisquick
  • 2 eggs
  • 1 cup milk
  • The Instructions:
  • Preheat oven to 350*F. In a large skillet, heat the oil and toss in the chicken and as much salt, pepper, and paprika as you want. Cook and stir until chicken is no longer pink. As the chicken browns, mix the two cans of soup, 1/2 cup of milk, frozen veggies and cheese together in a 9 x 13 inch baking pan. (You can add more salt and pepper to the mix if you'd like). Stir in the cooked chicken and spread mixture evenly in the pan. In a medium bowl whisk together the Bisquick, eggs, and 1 cup of milk. Pour onto chicken mixture and smooth with a spatula so the mixture is covered. Bake uncovered for 30-45 minutes and serve hot. *If your "pie" is very full, you might want to place a cookie sheet under the baking dish to catch any drips that might occur when chicken mixture bubbles over.

The Results:

Much, much better! This pot pie had a lot of flavor and was definitely not bland. I was very pleased with how it turned out and my husband practically licked his plate clean - haha. Adding the cheese and the spices really perked up the flavor but didn't take away from the simplicity and ease of this comfort-food recipe.

The Reviews:

This was definitely a hit with my husband! I'm sure he'll be requesting this recipe a lot in the future - especially once the weather turns colder. It also has the added benefit of freezing quite nicely - which is why I make such a huge pan for the two of us. By the time he has seconds for dinner, and scoops a big serving into his lunch container I still have at least 2 servings to freeze for later.

Saturday, July 10, 2010

Hamburger Patties

The Mission:
To make hamburger patties. I realize this sounds ridiculously simple and that most people have done this before. But the truth is that I have never made them. My parents always bought pre-made patties, and for the most part I have too. If handmade patties were ever served at my house, it was because someone else made them. So, since the grocery store didn't seem to have good pre-made patties, I bought some ground beef and made my own :)

The Ingredients:
  • 3 lbs ground beef
  • 6 tsp A-1 Steak Sauce
  • 6 tsp Worcestershire Sauce
  • 1 1/2 tsp garlic powder
  • 1 1/2 tsp onion powder
  • 1 1/2 tsp ground pepper
  • 1 1/2 tsp salt
  • 2 tsp parsley flakes
The Instructions:
With clean hands, thoroughly mix all of the ingredients in a large mixing bowl. Shape meat mixture into equally sized patties. I made 12. Next time, I will make 8 bigger ones so they won't be so small after shrinking.


The Results:

Besides the fact that the patties shrunk up more that I would've liked, the hamburgers turned out great. The flavor was fantastic, and they were grilled to perfection. Obviously my husband's grilling skills have improved quite a bit over the years.... though he does need to work on his powers of recommendation when it comes to patty size. I was sure they were too small, but he assured me that they would be fine. Oh well. They were definitely edible!

The Reviews:
Everyone at the small dinner party thought they tasted great. There weren't any serious complaints about the size, though it did make for some funny jokes. All in all, I got quite a few compliments on the flavor of the patties, so I'm pretty proud of how they turned out :) with clean hands, thoroughly mix all ingredients in a large mixing bowl. Shape meat into equally sized patties - I made 12. Grill, broil, whatever until hamburgers are done to your liking. My wonderful husband grilled them for me ;)