Showing posts with label dessert. Show all posts

Friday, April 22, 2011

New York Cheesecake

The Mission:
To make a cheesecake for my husband for his birthday.  Even though his birthday was two weeks ago, I figured he'd still like one!  I've only made one cheesecake in the past, but since he's not a fan of raspberry, I decided to go with a tried and true New York style using a recipe that I stole from my sister.  Since I had the day off and my husband had to work, I planned to have this delicious dessert prepared for him when he got home as the grand finale to a yummy meal of corned beef with cabbage and potatoes.
  
The Ingredients:
  • 1 1/4 cups graham cracker crumbs 
  • 1/4 cup granulated sugar 
  • 1/3 cup butter, melted 
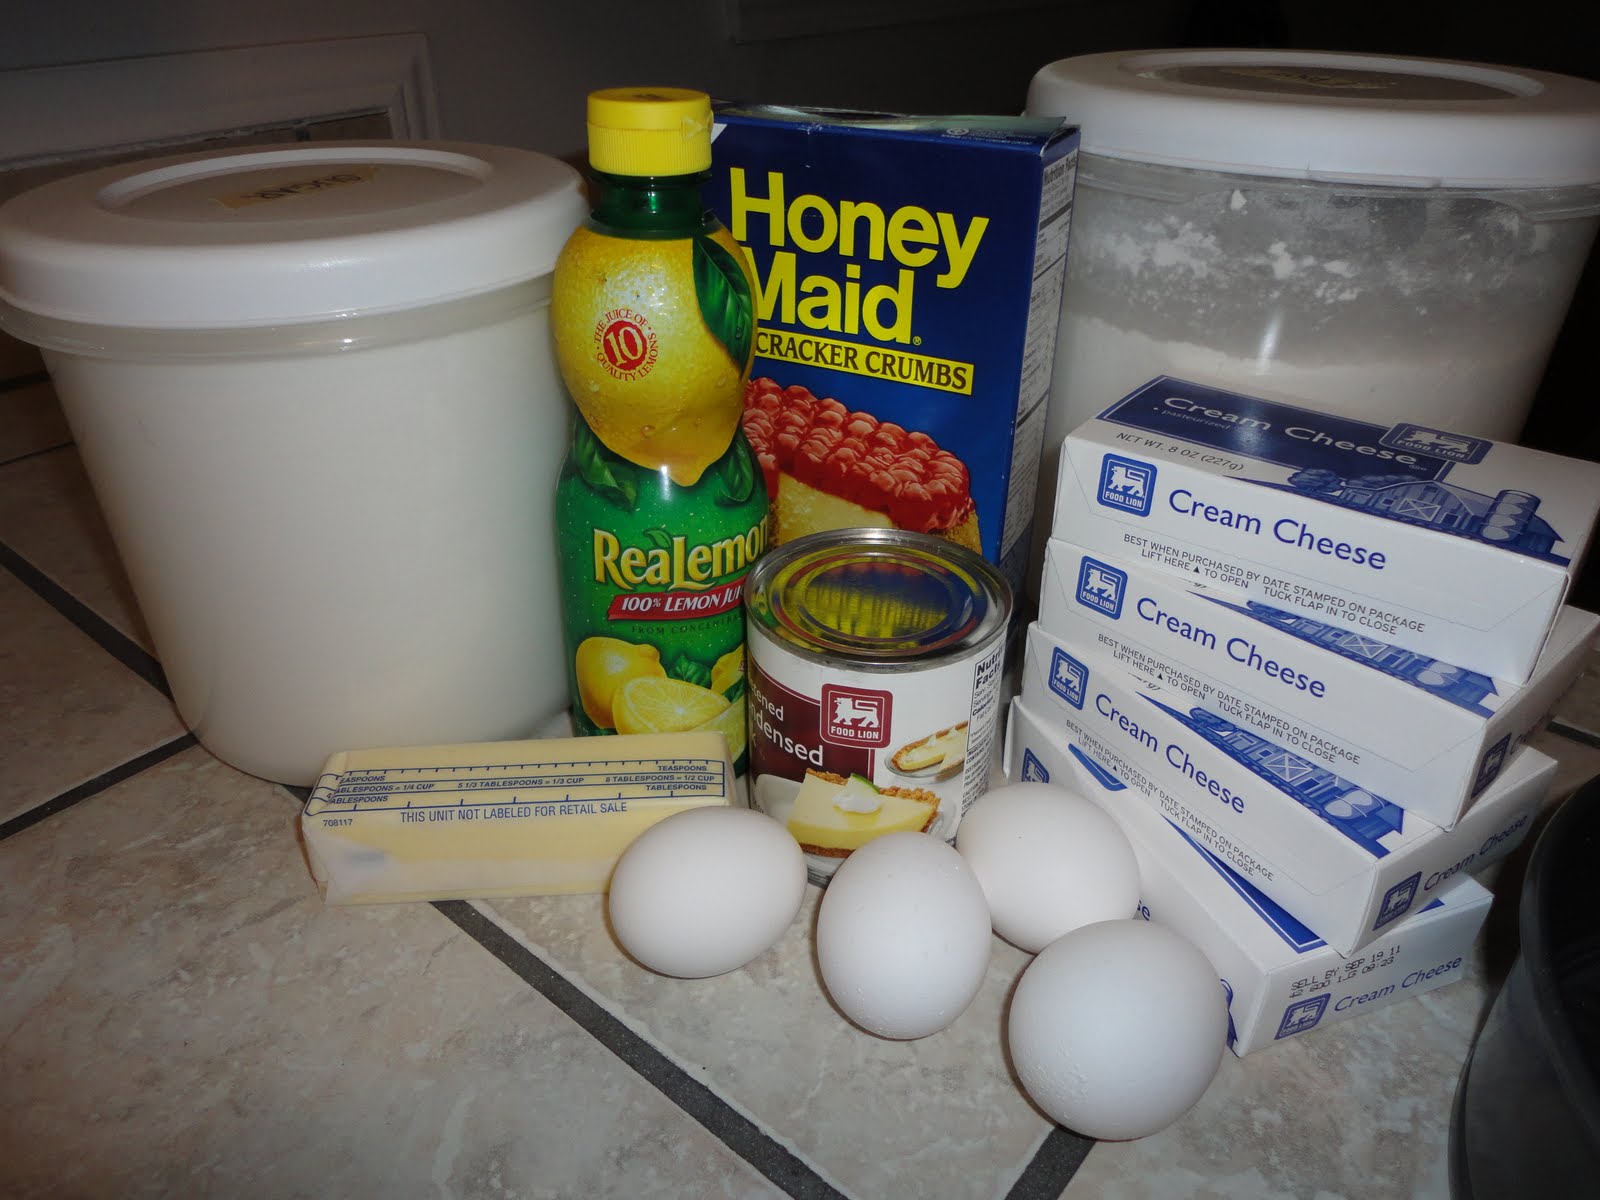
  • 4 (8 oz. each) blocks of cream cheese, softened 
  • 1 (14 oz.) can sweetened condensed milk 
  • 4 eggs
  • 2 Tbsp flour
  • 1/4 cup lemon juice 
The Instructions:
  1. In a medium sized mixing bowl combine the graham cracker crumbs and the sugar.  Pour in the melted butter and stir with a fork until crumbs are evenly moistened.  
  2. Press the mixture firmly and evenly onto the bottom of a 9" spring form pan.  
  3. In a large mixing bowl, beat the cream cheese until fluffy.  Gradually beat in the sweetened condensed milk until mixture is smooth. 
  4. Add in the eggs, flour, and lemon juice, mixing well.  Pour cheese mixture into the pan.  
  5. Bake in a preheated 300*F oven for 1 hour and check - the edges should be solid and the center of the cake should be jiggly (like pudding) - it will set as it cools.  If cake is too jiggly or liquidy, bake longer, checking every 5 minutes or so.   
  6. Cool cake on the counter for an hour and then transfer to the fridge to chill for at least 4 hours.  Serve with whatever topping you'd prefer (raspberry sauce, cherry pie filling, etc.) or enjoy plain.   
The Results & Reviews:
YUM!  It turned out fantastic.  My husband was very, very happy with his birthday cake - he's very reluctant to share, so I'm not sure I'll get any other reviews..... though I'm pretty proud of myself that it turned out so well on the first try.  I used a dark non-stick spring form pan, which made my cake bake a little quicker than usual, so I adjusted this recipe to bake for 1 hour instead of the extra ten minutes my sister's recipe had listed.  The flavor, density, and creaminess of this cheesecake are an excellently rich combination.  I'd recommend not taking too big a piece, since a little goes a long way with this delicious dessert.

Saturday, January 15, 2011

Pecan Pie

The Mission: 
To use some of the pecans that husband's friend gave us after Christmas.  I'd heard that The Pioneer Woman makes a fabulous pecan pie, so I went to her website and decided to use this recipe.  I was pretty pleased to see that I had all of the ingredients on hand.... though I chickened out and used a store bought refrigerated pie crust instead of making my own.  (Though I do  plan on trying my hand at pie crust some other time..... eventually..... when I find my courage the time.)

The Ingredients:
  • pie crust - unbaked 
  • 1 cup sugar
  • 3 Tbsp brown sugar 
  • 1/2 tsp salt 
  • 1 cup corn syrup (I used light) 
  • 3/4 tsp vanilla extract 
  • 1/3 cup melted butter (salted) 
  • 3 eggs 
  • 1 heaping cup of broken pecans   
The Instructions:
  1. Prepare the pie crust in a 9" pie plate.  
  2. Pour the pecans into the unbaked crust.  
  3. Mix the remaining ingredients in a medium mixing bowl and pour mixture over the pecans.  
  4. Cover the top and crust of pie gently with aluminum foil.  
  5. Bake in a 350*F oven for 30 minutes.  
  6. Remove foil and bake an additional 20 minutes.  
  7. If the pie is too jiggly, re-cover with foil and bake until set.  (My pie took an extra 15 minutes in the oven until I felt it was solid enough.)   
The Results & Reviews: 
 Okay.  Let's start off with things that were good... 
1 - For the most part it tasted fine.... well at least the filling did.  The crust edges were a bit too done for my taste.
2 - It was easy enough to make, though apparently I'm missing something since it wasn't perfect (or even close to perfect).

Now let's talk about what is not so good.
1 - Even though I recovered with aluminum foil in order to bake the jiggly pie an extra 15 minutes, the crust came out too done and the top tasted a tad burnt.  (and the filling somehow managed to stick to the foil and peeled off - you can see in the pictures.)
2 - it was UGLY.  Really ugly.  Again - see pictures.
3 - The crust cracked during baking and syrupy filling got underneath and stuck everywhere.  Not quite sure how that happened.
4 - As the husband pointed out, the gel part of the filling wasn't smooth but instead had turned lumpy and weird.

Overall score:  No one else ate or saw the pie except for the two of us, so I don't have many reviews to go by.  If I do make pecan pie again - which I will soon - I will try a different recipe.  Obviously I missed some key step in this one in order to have it turn out lovely and rave-worthy.  But since we ate it and didn't throw it out, I guess it wasn't all that bad.  I'm just glad I didn't attempt this for company!

Sunday, December 19, 2010

Scotcheroos

The Mission:

Make Gramma's Scotcheroo recipe for Christmas time. It's been many years since I've made these or even eaten one. In my family it's quite a big hit. Gramma's been making them for many years and passed on her recipe to me. They're easy enough to make and everyone seems to love them.

The Ingredients:

  • 1 cup sugar
  • 1 cup light Karo syrup
  • 1 cup creamy peanut butter
  • 6 cups Rice Crispy cereal
  • 1 cup chocolate chips
  • 1 cup butterscotch chips

The Instructions:

  1. In a 4 quart saucepan cook the sugar and syrup over medium heat stirring frequently until boiling. Remove from heat.
  2. Stir in the peanut butter. Add the Rice Crispies and stir until blended. Lightly press mixture into a greased 9 x 13 inch pan.
  3. Melt the chocolate and butterscotch chips together and stir until blended. Spread evenly over the crispy mixture.
  4. Cool until firm - do not put in the refrigerator - and then cut into bars.
The Results & Reviews:

They turned out absolutely divine! I melted the chips together in the double boiler which makes it very easy to get a nice smooth texture. I also find it easiest to measure out the peanut butter and rice crispies ahead of time so I can stir them immediately into the hot sugar/syrup mixture. Make sure you use a large enough pan to stir in all six cups of rice crispies.

My husband had never had these before and raved about how tasty they were. I have a feeling that he'll be requesting these often in the future. They always disappear quickly off of a cookie tray, but I always make sure to reserve a few for my family who are die hard Scotcheroo lovers.


Saturday, December 18, 2010

Chewy Ginger Cookies

The Mission:
Make yet another kind of cookie for Christmas this year that is tasty and delicious. I selected these chewy ginger cookies that I've made in the past but apparently never blogged about. They come out very soft so if you're looking for crunchy ginger snaps, this is not the recipe for you! But if you enjoy a chewy, spicy treat - then give this recipe a try. (This is a doubled recipe and makes about 8 dozen or so cookies)


The Ingredients:
  • 4 and 1/2 cups flour
  • 4 and 1/2 tsp gruond ginger
  • 2 tsp baking soda
  • 2 tsp ground cinnamon
  • 1 and 1/4 tsp ground cloves
  • 1/4 tsp salt
  • 1 and 1/2 cups shortening
  • 2 cups sugar
  • 2 eggs (not 4 like pictured)
  • 1/2 cup molasses
  • 3/4 cup extra sugar for rolling

The Instructions:

  1. In a large mixing bowl cream the shortening, eggs, 2 cups sugar, and molasses.
  2. Beat in all of the spices and mix well. Gradually add the flour and mix until dough is formed.
  3. If desired, refrigerate dough for an hour or so. Roll dough into 1-inch balls and roll each ball in the extra sugar.
  4. Place sugar coated balls on a non-greased cookie sheet and press down lightly with the bottom of a glass.
  5. Bake for 8 to 10 minutes in a preheated 350*F oven or until cookies are done. Cool on a wire rack and store in an airtight container.

The Results & Reviews:

They turned out really well and I'm glad I learned the trick of pressing them down a bit with a glass before baking. They don't spread very far and I found that if they weren't pressed down, they came out a little humped and underdone in the middles. Now - ginger cookies are not beloved by all people like chocolate chip are, so some people won't care too much for them. I found that it's nothing personal. I happen to love ginger, so of course I like this recipe. Mom would rather have them crunchy and thinner so next year I'm going to make a dozen or so that are pressed much flatter than normal to see how they turn out!

Sunday, November 28, 2010

Libby's Famous Pumpkin Pie


The Mission:
To make two delicious pumpkin pies to bring for Thanksgiving dinner at my parent's house. And the only way I know how to make delicious pumpkin pies is to use the original Libby's recipe. It's what I've always used and it tastes absolutely wonderful, so I really don't feel the need to try anything else. I am lazy, though, and buy pre-made pie crusts.... perhaps that's cheating but I'm okay with it :)

The Ingredients:
  • 1 can (29 oz.) Libby's 100% pure pumpkin
  • 2 cans (12 oz. each) evaporated milk
  • 1 and 1/2 cups sugar
  • 1 tsp. salt
  • 2 tsp. ground cinnamon
  • 1 tsp. ground ginger
  • 1/2 tsp. ground cloves
  • 5 large eggs
  • 2 unbaked 9 inch pie crusts
The Instructions:
  1. In a large mixing bowl, beat together the canned pumpkin, sugar and all of the spices.
  2. Line 2 9-inch pie plates with the pie crust and press the edges into scallops.
  3. Crack one egg into each pie crust, making sure not to break the yolk. Swirl the pie plates around until the egg white has coated the bottom of the crust. Pour the eggs into the pumpkin mixture and set the pie crusts aside.
  4. Add the remaining eggs to the pumpkin mixture and beat in well. Gradually stir in both cans of evaporated milk.
  5. Divide pumpkin equally between both pie plates making sure you don't over flow the crust. Place strips of aluminum foil over the crusts to prevent burning. (If you have pie shields, use those instead.)
  6. Bake in a preheated 425*F oven for 15 minutes.
  7. Reduce heat to 350*F and bake for 40 - 50 minutes or until knife inserted near center comes out clean.
  8. Cool on wire racks for 2 hours. Serve with cool whip, whipped cream, ice cream, or plain.
The Results & Reviews:
The pies turned out fantastic as I knew they would and everyone gobbled them up. Dinner guests were very complementary, which is always an absolute joy! I'm always sad to see that they're gone since I have an addiction to pumpkin pie and would be happy to eat them all by myself without sharing!
Note: This recipe turns out much, much tastier than Libby's "Easy Pumpkin Pie" with the spices already mixed into the canned pumpkin. I highly recommend using the original and not subsituting "pumpkin pie spice" for all of the individual spices either.

Monday, August 2, 2010

Crumb-Top Choco-Peanut Butter Bars

The Mission:
To find an easy cookie/bar recipe to take to a surprise birthday party. I really wanted to find something that didn't require a trip to the grocery store, either.... so I scoured my little recipe booklets - the ones you can find in the grocery store checkout lane - to find the perfect bar. Success was met when I found this yummy recipe out of a 2005 "Treasury of Holiday Cookies" featuring Jif Peanut Butter.

The Ingredients:
  • 1 cup semisweet chocolate chips
  • 1 cup packed brown sugar
  • 2/3 cup creamy peanut butter
  • 1/2 cup butter (1 stick)
  • 1 egg
  • 1 tsp. vanilla extract
  • 1 1/4 cups flour
  • 1/2 tsp. salt
  • 1/2 tsp baking soda
  • 1 1/2 cups quick oats

The Instructions:
Preheat the oven to 350*F. Grease a 13x9 inch baking pan - I used a non-stick pan so I skipped this step. Melt the cup of chocolate chips - either in a double boiler or the microwave and set aside. In a large mixing bowl cream the butter, brown sugar, and peanut butter until smooth. Add in the egg and vanilla and beat well. Sift in the flour, baking soda, and salt and mix until combined. Stir in the oats. Take 3/4 of the dough and press into the bottom of the baking dish, then spread with the melted chocolate. Dot the chocolate layer with the remaining dough. Bake for 25 minutes and let cool. Cut into bars and serve!

The Results:
I was really making this in a hurry, so I was a bit scared of how they'd end up, but they turned out great. I melted the chocolate in the double boiler, but in retrospect, it probably would've been easier to use the microwave. Even with the melting step, this recipe was easy to put together - using the non-stick pan really helped too, it was a breeze to cut and remove the bars from the pan! They smelled delicious, too :)

The Reviews:
Everyone had great things to say about them, especially my husband. A friend cut them into mini-bars so they were bite sized and easy to handle - they disappeared quite quickly from the serving plate. All in all - they tasted great, were easy to make, and I didn't get any leftovers since my husband took them all! haha. This recipe is definitely a keeper.

Saturday, July 3, 2010

Chocolate No Bake Cookies

The Mission:

Make the chocolate no bake cookies that my husband has been requesting. I checked out numerous recipe websites and this seems to be the classic recipe. I didn't bother hunting through my cookbooks for this one since I was in a hurry :)


The Ingredients:
  • 1/2 cup butter
  • 2 cups sugar
  • 1/2 cup milk
  • 4 Tbsp cocoa powder
  • 1/2 cup peanut butter
  • 2 tsp vanilla extract
  • 3 cups quick cooking oats

The Instructions:
In a 4 quart pot combine butter, sugar, milk, and cocoa powder. Bring to a rolling boil and boil for one minute. Remove from heat and stir in the peanut butter and vanilla until smooth. Add the oats. Drop by rounded tablespoon onto wax paper lined cookie sheets. Cool until set.


The Results:
I think they turned out great. Though I probably should have made a double batch.... I doubt these will last long at my house. I really hope that I can refrain from eating all of them until my husband gets home on Monday.... Wish me luck :)

The Reviews:

coming soon!

Wednesday, March 3, 2010

Lemon Glaze & Lemon Pound Cake

The Mission:
To make yet another dessert for my best friend's birthday party. He requested "chocolate" or "lemon" so here's part two! And again, instead of making a simple boxed cake, I tried something different :) I altered my Cream Cheese Pound Cake recipe by adding the zest of one lemon and leaving out the vanilla extract. Here's the original recipe: Cream Cheese Pound Cake.

The Ingredients:
  • 1 1/2 cups butter, softened
  • 1 (8 oz) package of cream cheese, softened
  • 3 cups sugar
  • 6 eggs
  • 3 cups flour, sifted
  • zest of one lemon
The Icing:
  • 2 cups confectioners sugar, sifted
  • 4 Tbsp butter, melted
  • 4 Tbsp lemon juice (I used the juice from the lemon I zested and had the perfect amount!
  • Mix all of the ingredients together until blended and pour over cooled cake.
The Instructions:
Preheat oven to 300*F. Cream the butter, cream cheese, and sugar together. Add eggs one at a time, beating well between each egg. Don't forget to scrape the sides of the mixing bowl. Add in the lemon zest and then slowly add the flour. I like to add one cup at a time, mixing thoroughly and scraping the bowl between each cup. Spoon the batter into a tube or bundt pan (it will be thick). Bake for approximately 1.5 hours. I usually set the timer for 1 hr 15 minutes and then test the cake for doneness. Cake is done when an inserted knife comes out clean.

The Result:
The icing ran way more than I thought it would. I'm not sure why. Perhaps I needed to thicken it up a bit by adding some more sugar. Who knows. Certainly not I. But the flavor was divine and complemented the cake very well. I think that the cake could use a tad more lemon flavor, so next time I might add a tsp of lemon extract in addition to the zest.

The Reviews:
Mark loved it! Which was the whole point of this recipe :) Everyone else thought it was really good. The rest of my dinner guests had very nice things to say about it, as did the recipients of my leftovers (namely coworkers and my parents). This twist on my pound cake is definitely a keeper :)

Somehow the pictures ended up being deleted. I shall blame the dog.

Tuesday, March 2, 2010

Dark Chocolate Cupcakes (with Chocolate Buttercream Icing)

The Mission:
  • To make something chocolatey to bring to my best friend's birthday party. And instead of baking a cake, I figured I'd do something different and make cupcakes. And since box cupcakes are easy and boring, I figured I'd try out a new recipe. I chose this recipe from my America's Test Kitchen: Family Cookbook. I fell back on my favorite website - recipezaar.com - for the icing.


The Ingredients:

  • 2 sticks butter
  • 4 oz. bittersweet chocolate, chopped
  • 1 cup cocoa powder
  • 1 1/2 cups flour
  • 1 1/2 tsp baking powder
  • 1 tsp baking soda
  • 1 tsp salt
  • 4 large eggs
  • 2 tsp vanilla extract
  • 1 1/2 cups sugar
  • 1 cup sour cream
    The Instructions:
  • Microwave the butter, chocolate, and cocoa powder together, whisking often, until melted and smooth (took me about 4 minutes). Set aside to cool. Combine the flour, baking soda, baking powder, and salt together in a small bowl and set aside. In a large bowl, wisk the eggs and vanilla together, slowly whisk in the sugar until combined. Stir in the cooled chocolate mixture. Sift in half of the flour mixture, stir in the sour cream, and sift in the remaining flour mixture. Line two muffin pans with cupcake liners and fill about two-thirds full. Bake in a 350* preheated oven for 18 minutes or until done. Let cupcakes cool and ice as desired.


The Icing:

  • 1/2 cup butter - softened
  • 2 2/3 cup confectioner's sugar, sifted
  • 1/3 cup half and half cream
  • 1 1/2 tsp vanilla extract
  • 1/2 cup unsweetened cocoa powder, sifted

Cream the butter in a small bowl. Blend in the cocoa powder, vanilla, and the confectioners sugar alternately with the cream. Beat with an electric mixer until the desired consistency. If needed, add a more cream. Click here for the Recipezaar link!


The Results:

Well - I thought they turned out good. Though I have to admit, it was waaaaaay too much work for something that wasn't just absolutely fantastic. So I probably won't make these again. The idea of a dark chocolate cupcake went over very well, though.


The Reviews:

I had my husband test them out before I took them to the party. He said that they were too bitter. Obviously he doesn't really care too much for dark chocolate. He made sure to tell me that it was a personal preference and that he wasn't implying that my cupcakes were awful. He said they were "hoity toity." hahaha. I got a big laugh out of that :) Everyone else who tried one liked them..... one person said they were very rich. Dad gave me his honest opinion and told me they were slightly on the dry side, but that he and Mom enjoyed them regardless. So this recipe isn't a winner, but it wasn't a total loss either.

Saturday, February 20, 2010

Gingerbread Pumpkin Trifle

The Mission:
To make a smashingly fantastic dessert to take to Mark's parents house since they had graciously invited us over for Thanksgiving lunch. I wanted to make something a little bit fancier than a traditional pumpkin pie (though I love pumpkin pie dearly!), so when I came across this recipe listed in the Taste of Home Thanksgiving 2009 booklet, I knew it would be perfect.


The Ingredients:
  • 1/2 cup shortening
  • 1/3 cup sugar
  • 1 cup molasses
  • 1 egg
  • 2-1/3 cups all-purpose flour
  • 1 teaspoon baking soda
  • 1 teaspoon ground ginger
  • 1 teaspoon ground cinnamon
  • 3/4 teaspoon salt
  • 3/4 cup hot water
Filling/Topping:
  • 2 cups cold milk
  • 1 package (3.4 ounces) instant vanilla pudding mix
  • 1 can (15 ounces) solid-pack pumpkin
  • 1/2 cup packed brown sugar
  • 1 teaspoon vanilla extract
  • 1/2 teaspoon ground cinnamon
  • 2 cups heavy whipping cream
  • 1/3 cup sugar
  • 1 teaspoon rum extract

The Instructions:
In a large bowl, cream shortening and sugar until light and fluffy. Beat in molasses and egg. Combine the flour, baking soda, ginger, cinnamon and salt; add to creamed mixture alternately with water, beating well after each addition. Pour into a greased 13-in. x 9-in. baking pan. Bake at 350° for 25-30 minutes or until a toothpick inserted near the center comes out clean. Cool on a wire rack. Cut gingerbread into 1/2-in. to 1-in. cubes; set aside. In a large bowl, whisk milk and pudding mix for 2 minutes. Let stand for 2 minutes or until soft-set. Combine the pumpkin, brown sugar, vanilla and cinnamon; stir into pudding. In another bowl, beat cream until it begins to thicken. Add sugar and extract; beat until stiff peaks form. Set aside 1/4 cup gingerbread cubes. In a 4-qt. trifle bowl or glass serving bowl, layer a third of the remaining gingerbread cubes; top with a third of the pumpkin mixture and whipped cream. Repeat layers twice. Crumble reserved gingerbread; sprinkle over top. Cover and refrigerate for at least 1 hour before serving.

The Result:
Oh wow! It was fantastic. I loved it.... though I think that I might use a little less rum extract in the whipping cream next time. Though everyone else thought it was delicious just the way it was. It turned out really pretty, too. Which is always a plus when I'm taking a dessert somewhere for a special occasion.

The Reviews:
This dessert got RAVE reviews. Everyone who tried it told me how amazing it was. I am so pleased with myself :) It was definitely worth the effort to make all of this from scratch. This will be a dessert I make every year for sure!

Tuesday, May 5, 2009

Banana Cake with Cream Cheese Icing

The Mission:
Use up the leftover buttermilk. So I searched through a few cookbooks and websites and found a Banana Cake recipe that sounded fantastic. I love a good fruit based cake.


The Ingredients:
  • 1 1/2 cups ripe mashed bananas
  • 2 tsps lemon juice
  • 3 cups flour
  • 1 1/2 tsp baking soda
  • 1/4 tsp salt
  • 3/4 cup butter, softened
  • 2 1/8 cups sugar
  • 3 eggs
  • 2 tsp vanilla
  • 1 1/2 cups buttermilk
The Instructions:
Preheat oven to 275*F. Grease and flour a 9x13" pan (or use non-stick). In a small bowl, mix the mashed banana with the lemon juice and set aside. In a medium bowl, mix flour, baking soda, and salt. Set aside. In a large bowl cream the butter and the sugar until light and fluffy. Beat in eggs, one at a time, then stir in 2 tsp vanilla. Beat in the flour mixture alternately with the buttermilk, then stir in the banana mixture. Pour batter into prepared pan and bake for one hour or until a knife inserted in the center comes out clean. Remove from oven and place directly into the freezer for 45 minutes. (This will keep the cake very moist and make it easier to frost.) Frost the cake with the cream cheese icing and garnish with chopped walnuts or pecans.


Icing Ingredients:
  • 1/2 cup butter, softened
  • 1 (8 oz) package cream cheese, softened
  • 1 tsp vanilla
  • 3 1/2 cups confectioner's sugar
Icing Instructions:
Cream the butter and cream cheese until smooth then beat in the vanilla. Add the confectioners sugar and beat on low speed until combined, then on high speed until frosting is smooth.


The Result:
It smelled soooo good. It looked very pretty as well. If I make it again, I will halve the cream cheese icing recipe, since I didn't use it all. I only iced 3/4 of the cake, since my husband doesn't like cream cheese icing. I just found out that I don't like it either, so I'll only be icing 1/3 of it next time!


The Reviews:
I thought it tasted fantastic. Mark really liked it, as did my favorite co-worker. My husband's not a big fan of bananas (now he tells me!) so he wasn't overly thrilled with it. I think he's crazy - haha. I left some for my parents to eat and they both loved it. And to get rid of the extra icing, I sent Mark home with the tub of it. I'm sure he's already polished it off with a spoon :)

Wednesday, April 29, 2009

Oreo Balls

The Mission:
Make Oreo Balls for Heather's Bridal Shower, They look fantastic. They sound tasty. And I'm pretty sure that they'll be impressive.


The Ingredients:
  • 1 package Oreo cookies, crushed
  • 1 (8 oz) package cream cheese, softened
  • 1 package white almond bark
  • 1 package chocolate almond bark

The Instructions:
Using a blender or a hand-held mixer, blend together the crushed oreos and the softened cream cheese. Roll into walnut sized balls and place on a cookie sheet. Chill for at least one hour. Melt approx 3/4 of the chocolate almond bark. Stick a toothpick in an oreo ball and dip it in the melted chocolate until coated. Place on a sheet of wax paper and allow to harden. Repeat for every oreo ball. While waiting for oreo balls to harden (approx 15 minutes), melt 1/4 of the white chocolate. Pour the melted chocolate into a decorator bag (or a plastic ziplock baggie with a tiny piece of the corner cut off). Drizzle white chocolate over the hardened oreo balls to decorate.

The Results:
Wow. I think they turned out pretty good. I had toothpick holes in each of the oreo balls and I didn't like that, so next time I'll try and figure out a way to elimate the holes. I also had problems with the oreo balls falling off the toothpick while I was dipping in the chocolate. I think next time I'll freeze the balls first. I'll see how that goes. They still turned out quite nice looking and I received a lot of complements on how professional they looked.


The Reviews:
I had not one single left over oreo ball. Everyone raved about how pretty they were and how good they tasted. My sister was very pleased with them and reserved a few for her to take back to school. I will definitely be making these in the future since they went over so well. The only complaint I got was from my husband, who didn't like the "wang of the cream cheese." But he doesn't like cream cheese, so his opinion doesn't count! ;)