Wednesday, December 17, 2008

Peanut Blossoms


The Mission: Christmas Cookie Recipe #6
These are always a huge hit. My friends and family beg me to make these every year. The tradition started with my Gramma and she taught me how to make them years and years ago. I can remember when I was so young that the only thing I was allowed to do was unwrap all the hershey kisses.


The Ingredients:
  • 1 3/4 cups flour
  • 1 tsp baking soda
  • 1/2 tsp salt
  • 1/2 cup sugar
  • 1/2 cup brown sugar
  • 1/2 cup shortening (I use butter flavored)
  • 1/2 cup peanut butter
  • 1 egg
  • 2 Tbsp milk
  • 1 tsp vanilla
  • 48 chocolate kisses - unwrapped
  • extra granulated sugar for rolling

The Instructions:

Cream the shortening, sugar, brown sugar, egg, vanilla, peanut butter, and milk in a mixing bowl. Add the baking soda and salt mixing until blended. Stir in the flour and mix until dough forms - it will be a little bit thick. Shape dough into balls, using a rounded tablespoon for each. Roll balls into granulated sugar and place on ungreased cookie sheet. Bake in a preheated 375*F oven for 10-12 minutes. Remove from oven and let cool for 1 minute - then top each cookie with a hershey kiss, pressing down firmly so the cookie cracks around the edges. Let cool completely before storing.

The Results:
MMMMMM. The peanut butter. The chocolate. It's delicious. They turned out perfectly! I doubled the recipe this time since there never seems to be enough to go around. I love to eat them fresh, when the hershey kiss is still kinda soft and melty. It's divine.

The Reviews:
It's hard to understand what people are saying when their mouths are stuffed full of cookies, but judging from the looks on everyone's faces and the emphatic head-nodding and thumbs-up gestures, I'd say they were a hit yet again!

Snickerdoodles

The Mission: Christmas Cookie Recipe #5
I usually don't make snickerdoodles at Christmas time, but I'm not sure why. I love them, they taste good, and they seem to be fairly popular. So this year I dug out my Gramma's recipe and went to work.


The Ingredients:
  • 1 3/4 cups sugar - divided
  • 1 Tbsp cinnamon
  • 2 1/2 cups flour
  • 2 tsp cream of tartar
  • 1 tsp baking soda
  • 1/2tsp salt
  • 1 stick (1/2 cup) butter
  • 1/2 cup shortening
  • 2 large eggs
The Instructions:
In a mixing bowl cream butter shortening, eggs, vanilla, and 1 1/2 cups of the sugar. Add baking soda, salt, and cream of tartar. Beat until combined, making sure you scrape the sides of the bowl occasionally. Beat in the flour. Cover and chill dough for an hour or so or until easy to handle. In a small bowl combine the remaining 1/4 cup of sugar and the cinnamon. Roll the dough into 1" balls and then roll balls in the cinnamon-sugar mixture until coated. Place 2" apart on an ungreased cookie sheet. Bake in a preheated 375*F oven for 10-11 minutes or until edges are golden. Transfer to a wire rack and let cool.

The Results:
They turned out really well. I doubled the recipe so I could have more of the cinammony sugary goodness. In my oven it only took 10 minutes for them to be done. I found that it's easier to get all of the dough balled and rolled in the cinnamon-sugar mixture before baking. That's my time-saving advice.

The Reviews:
My friends who tried them said that they were even better than the sugar cookies (which for them is saying something). My husband loved them. Apparently he's never had them before. He was a bit skeptical at first, but once he had one, I think he ate a dozen. Now he's begging me to make more!

Sugar Cookies


The Mission: Christmas Cookie Recipe #4
Mmmm. Sugar cookies. Yum. Now - I'm incredibly lazy and didn't make the cut-outs. These are just round cookies. But to spruce them up for Christmas time, I roll them in red or green sugar. It makes them much more festive!


The Ingredients:
  • 2 cups sugar
  • 1 cup butter (use real butter - not margarine)
  • 1 tsp. vanilla
  • 1/2 tsp. salt
  • 2 eggs
  • 2 and 2/3 cups flour
  • 2 tsp. baking powder
  • 3/4 tsp. baking soda

The Instructions:

Cream the butter, sugar, and eggs. Add the vanilla extract, baking powder, baking soda, and salt. Mix until blended. Gradually add in the flour and mix well. I find that chilling the dough for a little while makes assembling the balls a little bit easier. I also recommend having a cookie scoop. Scoop out dough by rounded tablespoon and roll into a ball with your hands. Then roll that ball into sugar - I use colored sugar.... it's more fun. Place balls on an ungreased cookie sheet about 2" apart. Bake in a preheated 375*F oven for 8-10 minutes or until golden brown.

The Result:
Yummy! (I think I overuse the word 'yummy,' but I don't care.) They turned out very nicely and I found a new method to the madness. I will clean my kitchen counter until it's completely sanitary. Then I will scoop out all the cookie dough straight onto the counter. Then I'll roll each scoop into a ball and roll into the colored sugar. Once they're coated in sugar, the balls won't stick to the plate where I'll put them until they're ready to go in the oven. It saved a ton of time, and a ton of mess! Not to mention you're never caught with sugar dough all over your hands when the timer goes off on a batch of cookies!

The Reviews:
The guys loved them. The husband was thrilled that I didn't change recipes, so I kept him happy. All in all - an excellent choice for Christmas Cookie give-aways. They were devoured at our friends' Christmas party and I got compliments all night. Hooray!

Buttermilk Pancakes

The Mission:
Use up the rest of the buttermilk that was needed for the coffee cake recipe. The easiest thing I could think of was to just make pancakes. Everyone likes pancakes, right? So I got out my trusty Red-Checkered Better Homes & Gardens cookbook and proceded to gather the rest of the ingredients. Thankfully they were all things I have stocked at all times! So as the husband slept in on this beautiful Saturday morning, I was in the kitchen making pancakes and preparing to bake a few more cookies.


The Ingredients:


  • 1 cup flour
  • 1 Tbsp sugar
  • 1 tsp baking powder
  • 1/4 tsp baking soda
  • 1 beaten egg
  • 1 cup buttermilk

The Instructions:
In a large bowl, combine the flour, sugar, baking powder, baking soda, and salt. Mix with a fork until blended, then create a well in the middle of the mixture. Set aside. In a separate bowl, gently beat eggs, then beat in the buttermilk. Pour into the well in the flour mixture and beat well. I've found that the more air you beat into the batter, the fluffier the pancakes will be. Pour batter onto a hot griddle or pan. I have found that each pan requires a different temperature. I usually start out with a medium heat and then adjust from there. I typically use a large ladle and make each pancake about 1/4 cup worth of batter. My Mom actually makes her batter in the blender - less drips when pouring onto the griddle! When the pancakes look dry around the edges, flip them over to cook on the other side. Pancakes are done when the batter is no longer runny and each side is a beautiful golden brown.


The Result:

As usal, the first batch came out all weird and burnt. I always seem to have trouble getting the temperature adjusted correctly. Hey - I never claimed to be a good cook, just an enthusiastic one! But once I got the temperature and the timing down, the subsequent batches turned out delicious and properly golden brown.


The Reviews:
I thought they were tasty. Buttermilk tends to make a "heavier" pancake, and I prefer mine light and fluffy. I probably won't make them again unless I have some buttermilk to use up. The husband liked them, though. He refused to get out of bed and eat them on Saturday, but I packed them for his breakfast (he eats it at work) on Monday and Tuesday and he seemed happy. I can only hope he ate them himself instead of donating them to a coworker or the trashcan!


Monday, December 8, 2008

Jumbo Raisin Cookies

The Mission: Cookie Recipe #3!

This is Dad's favorite recipe. He adores them. He loves them. He craves them! Gramma has been making these for a very long time and the recipe has been handed down to me. It's Christmas tradition that I make these cookies for Dad every year. I also make them for Father's Day :) It's a very easy present to make. And there's no chance that the Husband will steal any of the cookies - because they contain coconut.... and the Husband is allergic.


The Ingredients:

  • 2 cups raisins
  • 1 and 1/4 cup water
  • 1 cup shortening (I use butter flavored)
  • 2 cups sugar
  • 3 eggs
  • 1 tsp vanilla
  • 1 tsp baking powder
  • 1 tsp baking soda
  • 2 tsp salt
  • 1 and 1/2 tsp cinnamon
  • 1/4 tsp nutmeg
  • 4 cups flour - sifted

The Instructions:

What you'll want to do first is boil the raisins so they'll have sufficient time to cool. I'll usually do this the night before and then just stick them in the fridge. ** Cream shortening, sugar, eggs, and vanilla in mixer. Add the cooled raisin mixture (do not drain). Beat in the baking powder, baking soda, salt, cinnamon, and nutmeg. Mix in the sifted flour until blended. Add the chocolate chips and coconut. Drop dough by rounded tablespoon onto an ungreased cookie sheet, placing them 2" apart. Bake in a preheated 375*F oven for 10-12 minutes or until golden brown. - Chilling the dough makes it easier.

**Once - many many years ago - Mom and I made these and skipped the cooling step. What could it hurt? Well - it was hot and melted the chocolate chips. Oops. We apparently weren't thinking very clearly. So - do not skip the cooling step! It's important :) Also - do not double this recipe. It's already doubled, and if you try and double it again, it won't fit in the mixing bowl. Yes - I do know this from experience.

The Result: They turned out delicious as always. Since these cookies stay extremely moist, I cut out wax paper to put between each layer as I put the cooled cookies in Dad's special tin. I highly recommend doing this - if you don't, the cookies will stick together and you'll end up with a big glob instead of pretty individual cookies.


The Reviews:
Dad is happy. Mission accomplished. I even took some left overs (the ones that didn't fit into Dad's special tin) to a party. Everyone who thought that they sounded good tried one and liked them. A lot of people don't care for coconut in their cookies - so they're not terribly popular. But everyone who likes coconut raves about them :) HOORAY!


Dad's Special Tin:
My family has a thing about the M&M guys. It all started with a gift set of M&M mugs. A yellow, a red, a blue, and a green. Dad liked the red guy. The blue one was playing a saxaphone, so it went to my sister. Mom got the green girl M&M since, well, Mom's a girl. So I got stuck with yellow. Who is portrayed as a happy-go-lucky character, but not the brightest bulb in the box. Oh well.

Lasagna

So it's 4 o'clock on Sunday afternoon and I don't know what to cook for dinner. I don't even know what groceries are in the house that I could use for dinner. All in all - I wasn't doing so well with my meal planning and my grocery list this weekend. Oh well. So I was contemplating being bad and just ordering pizza when my husband called me from the grocery store, asking if I'd mind making lasagna tonight - he'd pick up everything we'd need, and what else did I want, since he couldn't find the grocery list. YAY! So I'm feeling pretty thrilled with my marriage right now, and I didn't have to agonize over dinner. Hooray.

Though I do tend to be a lasagna snob - my Gramma makes the best lasagna in the entire world and it's her recipe that I usually use - I figured that there wouldn't be any harm in making a lasagna from jar sauce and other "I don't have time" ingredients. So this is what I threw together....


The Ingredients:
12 to 15 lasanga noodles - cooked and drained.
1 lb ground beef - browned and drained of fat.
3 lbs (48 oz) jar spaghetti sauce
1 lb (16 oz) riccota cheese
2 cups grated mozarella cheese
2 eggs
1/2 cup grated parmesean cheese
3 Tbps parsely flakes
1 cup grated mozarella cheese (to be added on top, not mixed with eggs etc)


The Instructions:
Pour a thin layer of sauce on the bottom of a 9'' x 13'' baking dish. Mix the rest of the sauce and the browned ground beef together. In a separate bowl, mix the riccota cheese, the mozarella cheese, the eggs, and the parsely. In the baking dish, cover the sauce with 4-5 lasagna noodles. Then spread half of the cheese mixture on the noodles. Follow with half of the sauce mixture. Then put 4-5 more noodles on, then the remaining cheese mixture, the remaining sauce mixture, and another layer of noodles. Top with the 1 cup of grated mozarella cheese. Then sprinkle liberally with parmesean cheese. And of course - when your husband looks at the lasagna and asks why you didn't put cheddar cheese on it, sprinkle top with lots of grated cheese to make him happy. Cover the dish with aluminum foil and bake in a 350*F oven for 45 minutes. Remove foil and bake for another 15 minutes. Remove from the oven and let sit for 15 minutes to help the lasagna set up. Enjoy!

The results:
yummy. Not the same as Gramma's and not as good, but definately a very tasty dinner for a cold Sunday evening. Both my husband and Friend Mark thought it was delicious and both men stuffed themselves full of my lasagna. Dinner was saved. The end.

Oatmeal Raisin Cookies


The Mission: Christmas Cookies #2

It has begun. The annual Christmas Cookie Baking! I'm spending the next week pumpking out dozens of deliciousness to share for the holidays. First up were chocolate chip cookies, but since I'd already blogged about those, I didn't bother including the recipe here :)


  • Ingredients:
  • 3/4 cup butter (1.5 sticks)
  • 1 cup brown sugar
  • 1/2 cup sugar
  • 2 eggs
  • 1 tsp. vanilla
  • 1 tsp. baking powder
  • 1/4 tsp. baking soda
  • 1/2 tsp. cinnamon
  • 1/4 tsp. cloves
  • 1 3/4 cups flour
  • 2 cups rolled oats
  • 1 cup raisins (for plumper raisins, soak in warm water overnight)
Instructions:
Cream together the butter, brown sugar, sugar, eggs, and vanilla. Add in the baking powder, baking soda, cinnamon, and cloves. Mix well. Make sure to scrape the sides of the bowl since the spices tend to puff up onto the sides. You don't want to miss out on any of the yummy, spicy flavor! Next add the flour. Your dough will become stiffer at this point, so you might want to increase the power of the mixer. Next add in the rolled oats. I usually use the old-fashioned kind instead of the instant. Mix everything well, making sure to scrape the sides of the bowl. Dump in the raisins (making sure you drain them if you had them soaking). Scoop dough by rounded tablespoon onto ungreased cookie sheets, leaving about 1.5'' between cookies. Bake each batch for 8-10 minutes in a preheated 375*F oven. Let cool on pan for a few minutes before transferring to a wire rack to cook completely.

The Result:
Yummy as always. My husband and Friend Mark taste tested the cookies stright out of the oven and were thrilled. It was difficult to keep them out of the cookies after that. I had to allot them a few for eating right away for fear they'd riot in my kitchen! The remaining cookies are safe in their tins awaiting distribution for the holidays.

Pear Coffee Cake with Ginger Pecan Crunch Topping

The Mission: Ingredient Challenge #2 - Pears

The Recipe:
Pear Coffee Cake with Crunchy Pecan Ginger Topping. Though it's a mouthful of a title, I still think it will turn out well. After all, it is a yummy coffee cake including ginger. I figured it'd be a nice, spicy addition to a breakfast menu. And it meets the requirements by including pears :)


The ingredients:
  • 2 1/2 cups flour
  • 3/4 cup sugar
  • 1 cup dark brown sugar
  • 1 tsp. salt
  • 1 tsp. nutmeg
  • 3/4 cup canola oil
  • 1 slightly beaten egg
  • 1 cup buttermilk
  • 1 tsp. baking soda
  • 1 tsp. baking powder
  • 2 cups chopped ripe pears
  • 1/2 tsp. ground ginger
  • 1 cup chopped pecans

The Instructions:
Mix together flour, sugar, brown sugar, salt, nutmeg, and oil. Set aside 1 cup of mixture for topping. Add 2 cups chopped ripe pear to the rest of the above mixture. Add egg, buttermilk, baking soda, and baking powder. Mix well. Spread in greased 9''x 13'' pan. Topping: add ginger and pecans to the reserved mixture and blend well. Sprinkle over top of batter. Bake at 350*F for 40 minutes or until knife inserted comes out clean.

The Result:

Delicious! Even though I figured out after putting it in the oven that I forgot to add the salt. Oops. But I didn't notice it in the final product, so oh well. I also wasn't sure whether or not to peel the skin off the pears. So I didn't. I took the lazy way out and hoped for the best. Success! I couldn't detect any skin at all in the cake once baked. Hooray.

The Reviews:

Dad - "yum!" Mom - "delicious!" Husband - "I don't eat pears." (so he didn't try any. Wuss.) Friend Mark - "Oh my God." All in all - it was a big hit. My coworker also enjoyed the piece I set aside for her. I'll be back with more reviews. Mom took the remaining cake to work so her coworkers could pass judgement.

Update: Mom's coworker's thought it was good, but no rave reviews.

Wednesday, November 19, 2008

Garlic and Mushroom Beef Roast with Sun-dried Tomatoes

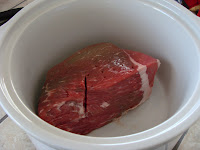
The Mission: Use the beef tip roast that I bought on sale at the grocery store.

The Recipe: I *heart* this recipe. It's so easy, it's so tasty, it's so comforting. I found it in one of those little recipe booklets you can find at the grocery store check-out lines. This one happens to be from the Sept 2004 Betty Crocker simple slow cooker one. 2004 - yeah, that's old! I tested it out originally on my parents years ago and they both adored it. It became one of our favorite crockpot roast meals.
The Ingredients:
3 to 4 lb. beef boneless rump or tip roast
1 tsp salt
2 cloves garlic, finely chopped
8 oz. small whole fresh mushrooms
1/2 cup sun-dried tomatioes in oil, drained and chopped
1/2 cup light Italian dressing


The Instructions: Spray a 12" nonstick skillet with cooking spray. If beef roast comes in netting or is tied, do not remove. Sprinkle beef with salt and garlic. Cook beef in skillet over medium-high heat 5-6 minutes, turning occasionally, until brown on all sides. Spray a 4-5 quart crockpot with cooking spray. Place mushrooms in pot. Place beef on mushrooms. Spread tomatoes over beef, then pour dressing over the mixture in the pot. Cover and cook on Low heat setting for 9-11 hours. Place beef on cutting board; remove netting or strings if necessary. Slice beef and serve with mushrooms and juices. Makes 6 servings.


The Results: Fabulous. End of story. Even if I take the lazy way out and skip the "browning meat" stage, it turns out wonderful. If I'm ill-prepared for this recipe and forgot to buy fresh mushrooms, I'll add a can of sliced mushrooms an hour before eating. They're not quite as good, but they still get the job done.

The Reviews: As previously stated, Mom and Dad love this recipe. My sister likes it as well, though she usually doesn't eat the mushrooms. My husband on the other hand isn't as thrilled with this roast as the rest of my family. Which is extremely disappointing, since I'd probably make it every week if he was up for it. Instead, I indulge in this yummy beefy goodness about once a month through the winter months. He can just deal with it.

Venison (or Beef) Chili

The Mission: Make delicious crockpot chili using Mom's recipe only substitute ground venison, since the husband's friend shared his poor Bambi's Daddy with us.

The Recipe: I love my Mom's chili. This is the recipe that she's been using ever since I was a small child. I'm not quite sure where she got it from, I think she said she adapted it from a couple of different recipes she found in the red-checkered Better Homes & Gardens cookbooks. Oh how I love those red-checkered bibles of goodness.

The Ingredients:
1 lb. ground beef (substitue venison or turkey if you wish)
2 cloves minced garlic
4 tsp. chili powder
1/2 tsp. ground cumin
15 1/2 oz. can of dark red kidney beans, drained
1 cup chopped celery
1 cup chopped onions
1/2 cup chopped green bell pepper
16 oz can of diced tomatoes
10 oz can of diced tomatoes with green chilis
8 oz tomato juice (I use canned sauce instead)
6 oz can of tomato paste
1/4 tsp. salt

The Instructions: In a large pot, brown the ground meat with onion and garlic. Drain any fat and add the rest of the ingredients. Let simmer for 2 hours. Enjoy.

The Result: Delicious as always. This time we shared the dinner with my parents, so I doubled the recipe. I also put it in the crockpot so it would be ready to eat. This is easily accomplished by browning the meat on the stove, and then assembling all of the ingredients in the crockpot. You'll want to cook it on low for 8-10 hours or on high for 3-4. I usually assemble everything the night before, so the chili has time to meld all the flavors in the fridge overnight, then I leave it on Low alllll day long! It's great to have yummy food waiting for you when you get home at night :) I love to eat my chili with cottage cheese. Mom likes to add sour cream. Dad and the husband enjoy adding shredded cheddar cheese. And everyone loves it with cornbread on the side.

The Reviews: Though the husband isn't a big fan of the chopped onions, peppers, or celery, I chop them really small using my food processor. They cook down so much that he doesn't really notice. Apparently if he can't see them, he doesn't know they're there! I've never had any complaints about this recipe. The whole family loves it! I've taken it to quite a few potlucks and have never had to worry about leftovers. I've been asked for the recipe several times as well.

Monday, November 17, 2008

Butternut Squash Cake Roll


The Mission: Since my first butternut squash recipe turned out to be a flop, I decided to try a second recipe. This time instead of making a side-dish, I went for a dessert. mmmmm......dessert...... This is a great way to use up a little bit of extra squash - the recipe only calls for 2/3 cup of mashed squash. So, it's definitely a recipe to use when you're already planning on doing something else with your butternut of goodness.
The Recipe: I was looking through my Taste of Home magazines to find an interesting recipe to make for dinner this week when I stumbled upon a fabulous picture of a cake roll - and to my delight it called for Butternut Squash which just so happens to be the ingredient for the current recipe challenge. Hooray! I hope mine turns out as pretty as the picture in the magazine....


The Ingredients:
3 eggs
1 cup sugar
2/3 cup mashed cooked butternut squash
3/4 cup all-purpose flour
1 tsp. baking soda
1/2 tsp. ground cinnamon
1 cup finely chopped walnuts (I used pecans)
Confectioners' Sugar
Filling:
1 package (8 oz) cream cheese, softened
2 Tbsp. butter, softened (I used real butter, not margarine)
1 cup confectioners' sugar
3/4 tsp. vanilla extract
Additional confectioners' sugar optional

Instructions: In a large mixing bowl, beat eggs; gradually beat in sugar. Add squash and mix well. Combine the flour, baking soda and cinnamon; add to squash mixture and mix well.
Line a 15" x 10" x 1" baking pan with waxed paper; grease and flour the paper. Spread batter evening into pan. Sprinkle with nuts. Bake at 375* for 13-15 minutes or until a toothpick inserted near the center comes out clean. Cool on a wire rack for 10 minutes.


Turn cake onto a kitchen towel that has been dushed with confectioners' sugar. Gently peel off wax paper. Roll up cake in the towl, jelly-roll style, starting with a short side. Cool completely on wire rack.

In a small mixing bowl, beat cream cheese, butter, confectioners' sugar and vanilla until smooth. Unroll cake; spread filling evenly over cake to within 1 inch of edges. Roll up again. Cover and refrigerate for 1 hour.

Just before serving, dush with confectiners' sugar if desired. Makes 10 servings.

The Result: Wow. The cake turned out fabulous! I have learned that my oven is a bit testy and tends to overbake my baked goods, so I only put the cake in for 11 minutes until it was done. I didn't have quite enough confectioners' sugar dusted onto my kitchen towel, so I ended up with a small bare spot on the cake because it peeled off. Oh well - it turned out alright in the end!
The Reviews: I ended up taking the Roll to a gathering on Sunday night. Everyone who tried it really liked it. (My husband doesn't care for cream cheese stuff, so he didn't eat the filling, but liked the cake part.) I had a few comments on how it was similar to a Pumpkin Roll, but that was to be expected. I was very pleased with the rave reviews it got - I even had one friend chastise my husband for not liking it! Hahaha. This recipe is definitely a keeper :)

Friday, November 14, 2008

Chocolate Chip Cookies!

The Request: Some of my husband's friends (all single) apparently get cravings for homemade food. So they end up at my house for dinner and dessert often. One of their favorite things is the simple yet delicious Chocolate Chip Cookie. I make them every time they have a big cook-out with their car club. I've never had to take leftover cookies home!

The Recipe: Nestle Tollhouse's Original Chocolate Chip Cookies
2 1/4 cups all-purpose flour
1 teaspoon baking soda
1 teaspoon salt
1 cup butter flavored shortening
3/4 cup granulated sugar
3/4 cup packed brown sugar
1 teaspoon vanilla extract
2 large eggs
2 cups chocolate chips.

Cream the shortening, the sugars, and the eggs. Add vanilla, soda, and salt. Gradually blend in flour. Add chocolate chips (I like to add a bit extra). Drop by rounded Tbsp onto cookie sheets. Bake in a 375* oven for 9-11 minutes. Cool on racks before storing.


The Result: I've never made a bad batch ;) Usually I double the recipe to maximize the yumminess. I love to eat them slightly warm with a nice glass of cold milk.

Saturday, November 8, 2008

Carmalized Butternut Squash

So a few of my really good friends and I decided to do a bi-monthly "ingredient challenge." Basically, twice a month we will decide on an ingredient and do something fun with it to see what happens. I'm really looking forward to this. It's just sad that distance won't let us taste each other's creating - we have a chef in NYC, Chicago, and then me in NC. I think the project will be tons of fun and I'm hoping to get a lot of new recipes out of it. Not to mention have a fantastic time adding some variety into my regular cooking routines.

The Challenge: Butternut Squash


The recipe: Carmalized Butternut Squash

2 medium butternut squash (4-5 lbs total)

6-8 Tbsp butter - melted and cooled

1/4 cup packed brown sugar

1 1/2 tsp kosher salt

1/2 tsp ground black pepper

Instructions:

Preheat the oven to 400*F. Cut off the ends of each butternut squash and discard. Peel the squash andcut in half lengthwise. Using a spoon, remove the seeds. Cut the squash into 1 1/4" to 1 1/2" cubes (large and uniform is best), and put them in a large bowl. Add the melted butter, brown sugar, salt, and pepper in the bowl. With clean hands toss all of the ingredients together and spred out in a single layer on a baking sheet or in a baking dish. Roast for 45-55 minutes until the squash is tender and the glaze begins to carmalize. Turn the squash while roasting a fe times witha spatula to be sure it browns evenly. Serve hot (makes 6 servings).

The Result: Well. Um. I didn't care too much for it. Not only did I fail to get the glaze to carmalize, I just didn't care for the salt and pepper with my squash. I think I'd rather have it with just the butter and sugar. Maybe all mashed up instead of roasted.

The Reviews: Mom - liked it, but thought there was too much pepper. Dad - isn't a big fan of squash, but ate it all. Husband - tried it, hated it. but he's not a big fan of squash either.


So, I manged to bomb the first recipe challenge. Oh well. Tomorrow I will try out a recipe I found for butternut squash cake roll and see if I can redeem myself!

Friday, November 7, 2008

Black Bean and Corn Salad (Dip)

The mission: Bring a side dish to the 6th annual Greyhound Lifesavers Picnic.


The recipe: Black Bean and Corn Salad (Dip) as found on http://www.recipezaar.com/

Salad ingredients:


  • 1 (15 oz) can black beans, rinsed and drained

  • 1 (15 oz) can corn, drained

  • 1/2 cup finely chopped red onion

  • 1 red bell pepper, finely chopped

  • 2 jalapenos, seeded and minced

  • 2 cans of Rotel diced tomatoes with cilantro and lime juice

Dressing ingredients:


  • 1/3 cup olive oil

  • 2 Tbsps lime juice

  • 1 Tbsp red wine vinegar

  • 1 clove minced garlic

  • 1 1/2 tsp ground cumin

  • 1 1/2 tsp dried oregano

  • 1 1/2 tsp salt

  • 1/4 tsp sugar

  • 1/8 tsp black pepper

Directions:


  • In a large bowl, comine salad ingredients

  • In a small bowl, whisk together dressing ingredients

  • Pour dressing over salad and toss until coated.

Notes: What you see above is the revised recipe after I made a few minor changes to the original. First, since fresh tomatos aren't in season, I decided to use a can of Rotel. I figured it would be tasty since it had the cilantro and lime juice, plus would add an extra little kick to the dip. Second, I originally used an entire red onion and I didn't chop it very fine. Consequently, the onion was extremely over-powering. After indulging in my latest concotion, I ended up with horrible "dragon breath." So I adjusted the onion to half and mentioned the finely chopping bit above.


The Result: It was tasty! Sadly, I don't have many reviews. In my excitement to get to the picnic in order to adopt our greyhound, I managed to leave the dip in the fridge and didn't realize it until I had already driven the 2 hours to Columbia. Ooops. So I brought it into work the following week and my coworker and I made a fabulous lunch, devouring an entire bag of tortilla chips loaded with my creation. (At least I wasn't the only one with dragon breath in the office!)


Review: I'd highly recommend taking this to picnics, barbeques, and potlucks. It was simple to make, has easy-to-find ingredients, and is colorfully attractive! Next time I'll probably add a diced green bell pepper to add a bit more color. It'd be easy to increase the quantities and spicy-ness to whatever you desire.


Thursday, November 6, 2008

Almost Romantic - London Broil

Last night's dinner was a tried and true staple. And since I served it at the table instead of plunking it down in front of the TV, it almost felt like a romantic dinner.

The menu:
*London Broil
*Rice from a box (Chicken & Broccoli flavor by Knorr's)
*Green Beans (canned for the husband, frozen for me)

What I found interesting was the conversation the husband and I had over dinner. Apparently he'd never had London Broil before he married me. I was baffled and astonished. I grew up eating London Broil. It was a popular menu item for my family and I learned how to make it when I was 10. It's quick to make, and doesn't involve many ingredients.

London Broil: Marinate top round steak in Italian dressing for 2-3 days. Broil in the oven 6" away from heat source for 7-8 minutes. Flip meat. Broil for another 6-7 minutes. Meat is done when it has reached an internal temperature of 130. Slice thinly and serve.

Simple. Easy. Tasty.

Wednesday, November 5, 2008

Introduction

In an effort to expand my weekly menus, get my husband to eat more interesting foods, and enjoy experimenting in the kitchen I realized that I need some motivation. With blogging becoming more and more popular, I decided it was time for me to join the crowd and share my kitchen concoctions. The goal: to try out and post at least one new recipe a week. Hopefully I'll manage to keep up ;)